Automated Drapes: Your Key to Sunrise on Demand
Introduction:
Picture this: it's moments before your alarm goes off, and the first rays of sunlight gently filter through your window, slowly waking you up with the promise of a new day. Now, imagine achieving this idyllic wake-up routine through DIY home automation. In this blog post, we'll dive into my latest project where I automated my drapes using a stepper motor, enabling me to greet each day with the natural light of the rising sun.
A Transition from Blinds to Drapes:
Before my latest project with automated drapes, I had my blinds set up to open just before my morning alarm. It was a fantastic way to wake up gently. However, as much as I loved my blinds automation, I realized there was room for improvement. Check out my blind automations here!
The primary reason for the transition from blinds to drapes was simple: I found that my room didn't get dark enough with the existing blinds. Sometimes, it's essential to have complete darkness for a good night's sleep, and blackout blinds were a bit too costly for my taste.
Considerations:
Before delving into the details of this DIY drapes automation project, let’s chat about what I wanted from it when designing this automation.
Quietness
First and foremost, the system had to be quiet. Since the automation was intended to be installed right next to my bed, I did not want to hear it. The last thing I wanted was to be startled awake by the noise of the system in the morning. It had to operate seamlessly, ensuring that the transition from night to day was gentle and unobtrusive.
Speed
Additionally, the speed of the automation was a significant consideration. It needed to move at a pace that felt natural. A swift, abrupt movement would have been counterproductive, potentially jolting me awake, which was precisely what I aimed to avoid. Therefore, the speed had to be finely tuned to complement the waking-up experience.
Concealment
One of the primary objectives was to make the entire automation system as concealed as possible. Ideally, I wanted to forget it even existed. It should blend seamlessly with the room's decor, camouflaged so well that it almost became invisible.
Ease of Control
Nothing else matters if this is not simple to control. Luckily with Home Assistant this will not be a problem!
The Solution:
Stepper Motors: Precision and Quietness
The technology behind this project is similar to my previous window automation setup (check it out to for more information here). I used a stepper motor, which offers precision and quiet operation. My previous post discusses how this system can be set up with a microcontroller, motor controller, and Home Assistant, so I will refrain from repeating myself here. Check it out to understand how to wire it all up! The current time to open the drapes is approximately 2 minutes with the default speed of stepper motors (the video above is sped up), controlled by the microcontroller. It's worth mentioning that this duration can be adjusted if desired, depending on your preference.
Installation: Mounting and Concealing
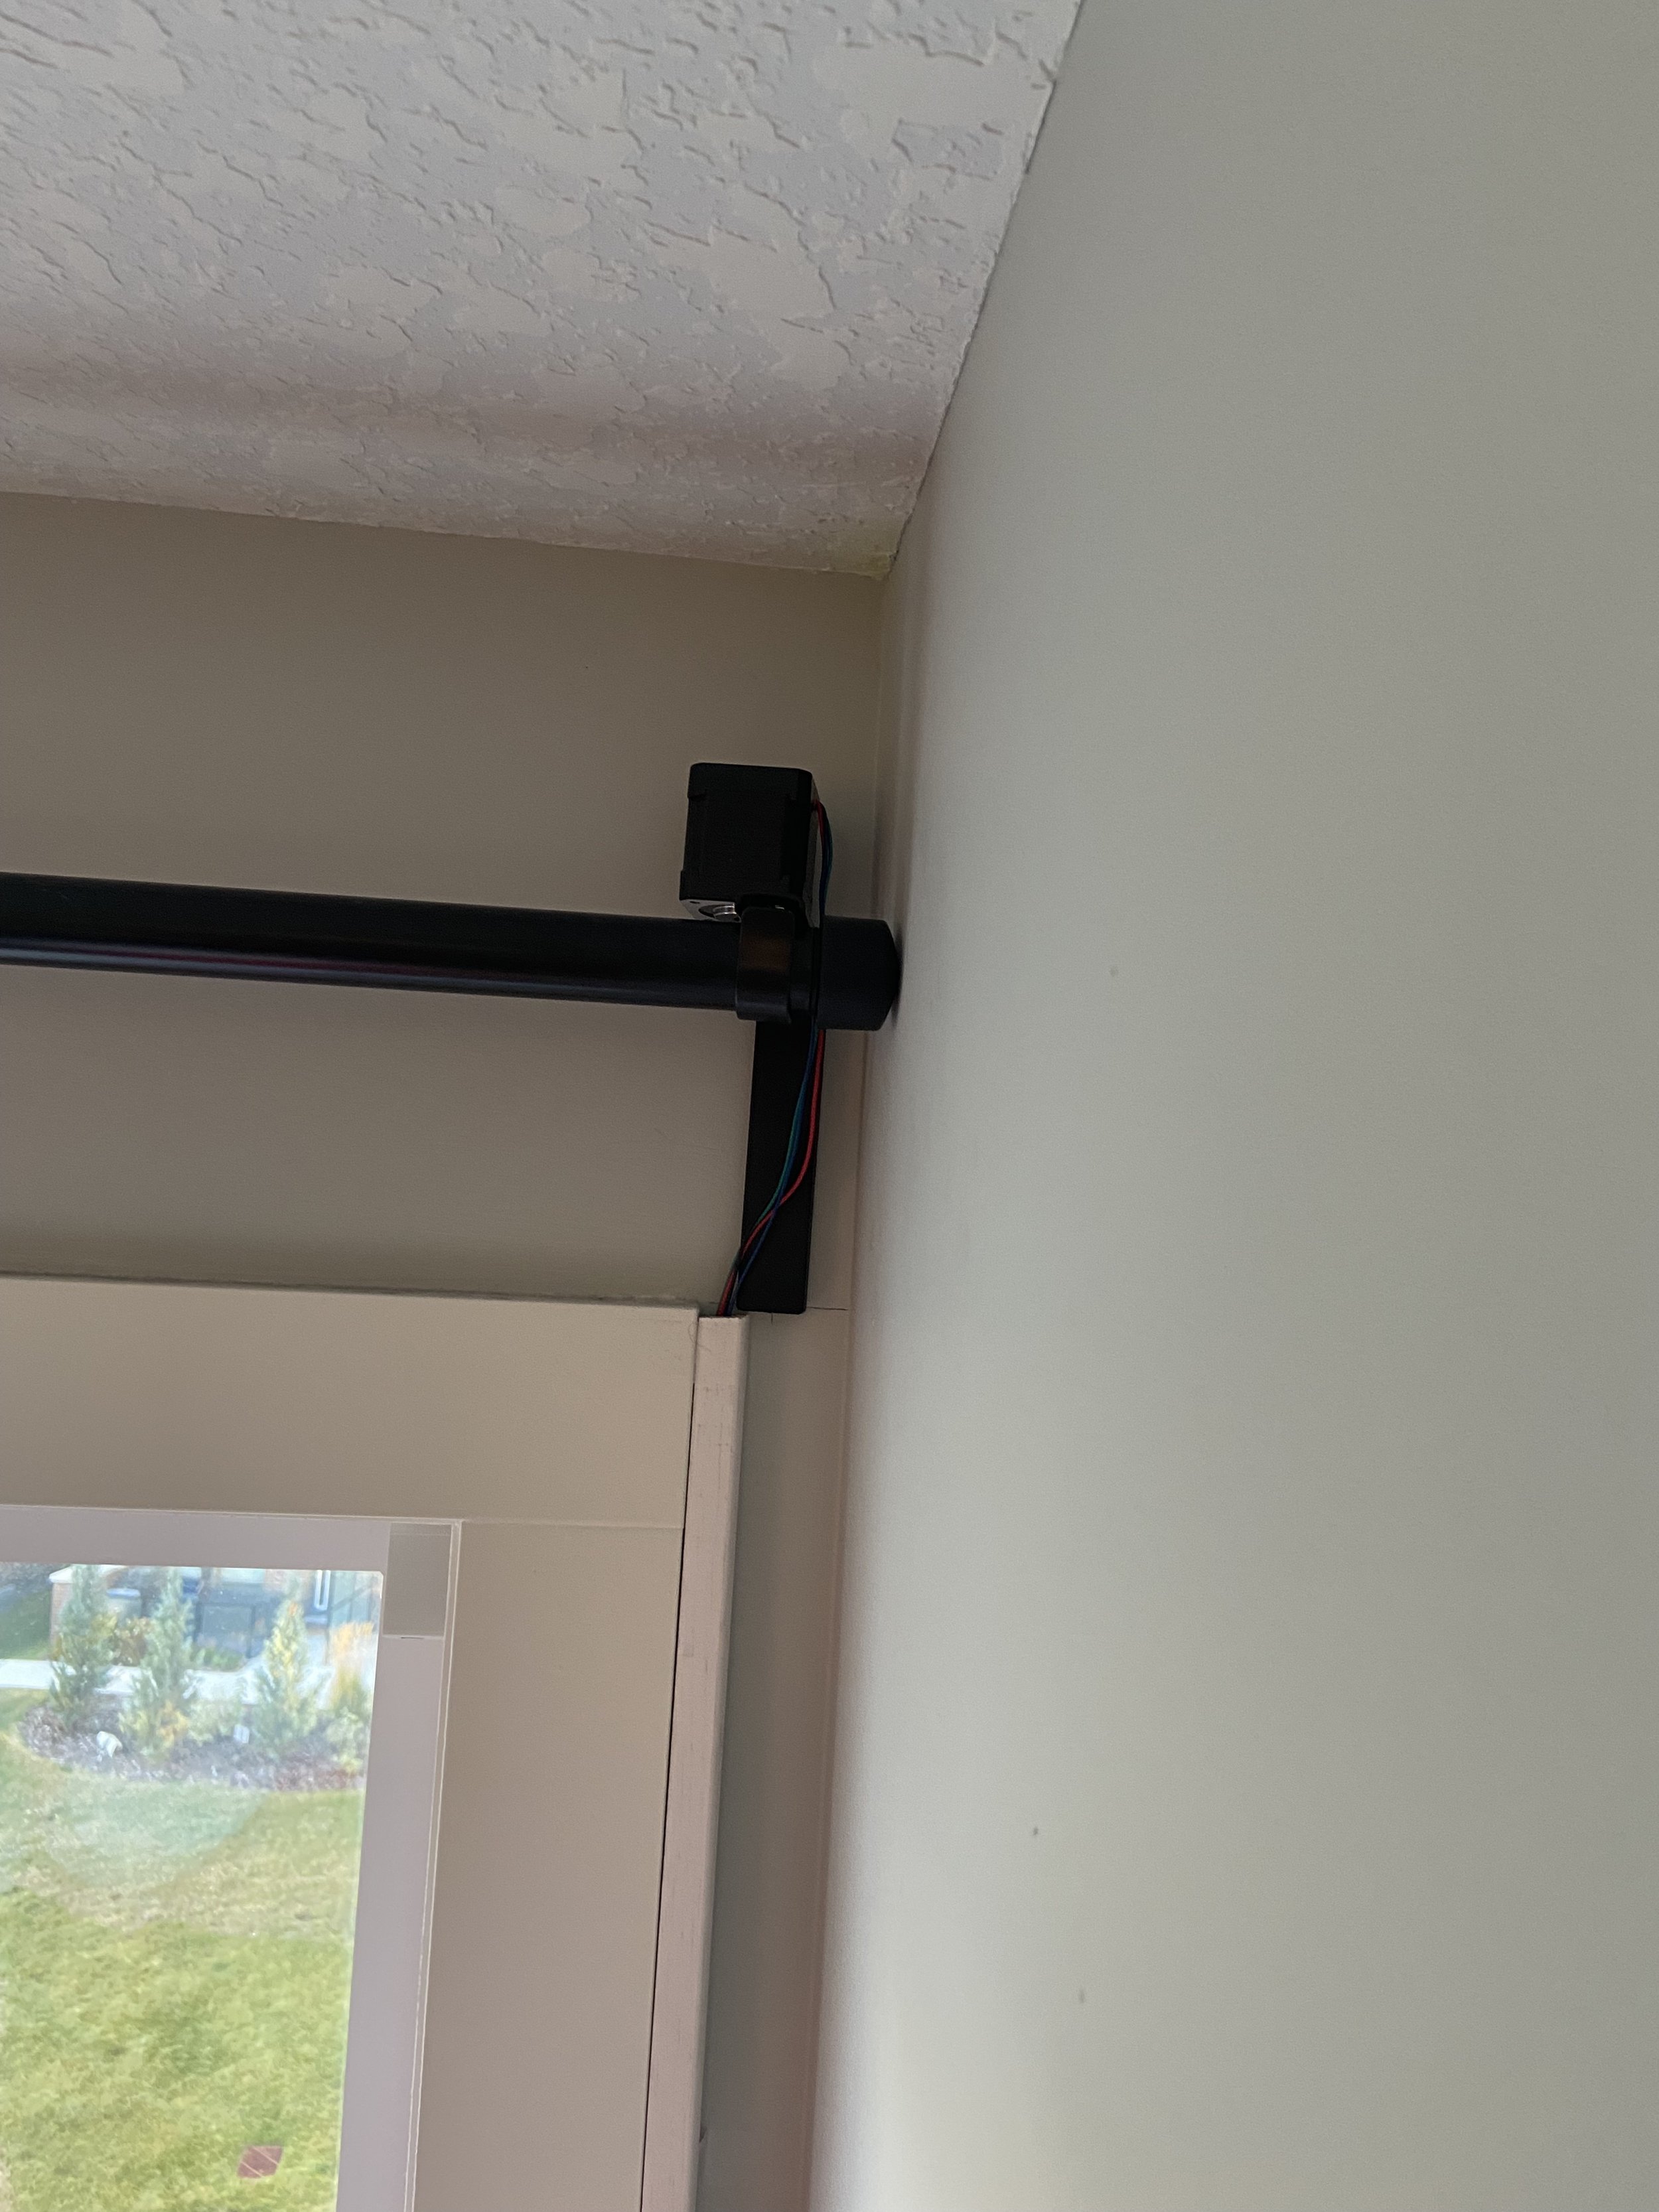
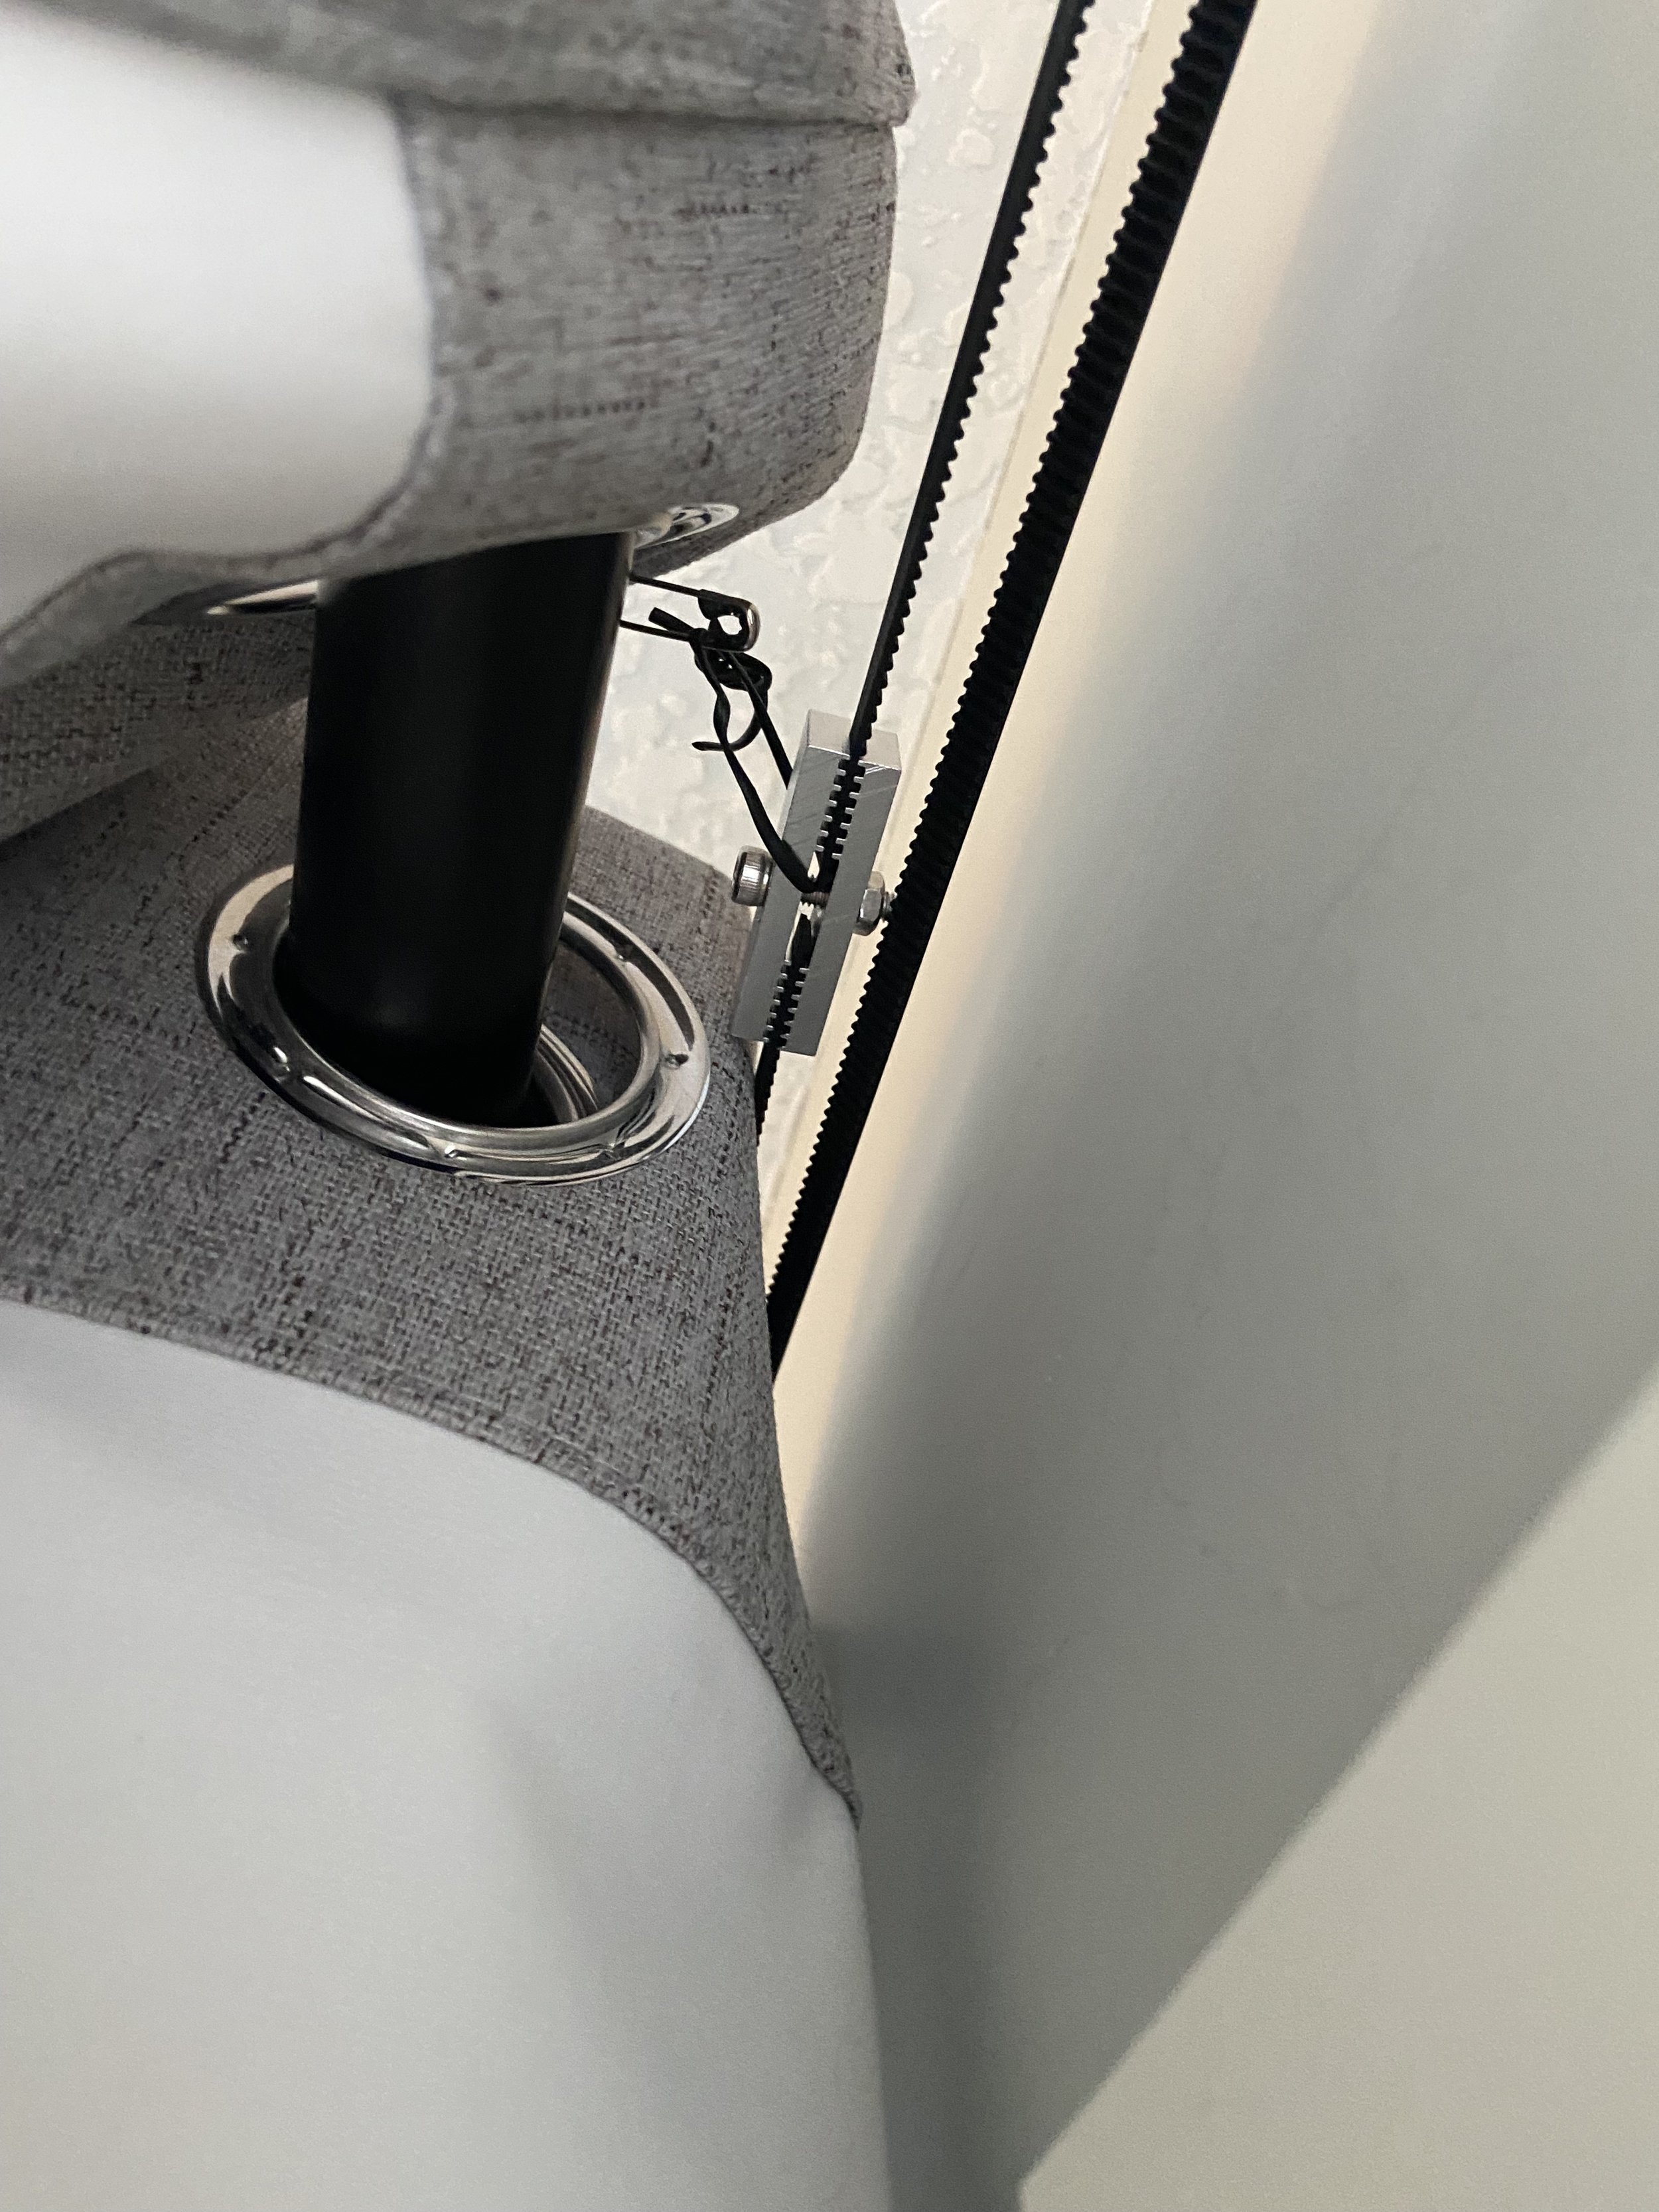
I installed the motor on the bracket that holds the drapes with the belt loop in behind the curtain rod. In this way very little of the system is visible. Since the motor is already black, I decided not to create an enclosure as is already blended in nicely. I ran the 4 motor wires down the edge of the window and covered it with some white corner moulding that I got at the hardware store.
I pinned one edge of the drape, and tied it to the joining section of the belt. In this way the drape will be pulled along with the belt and the position on the belt will not change.
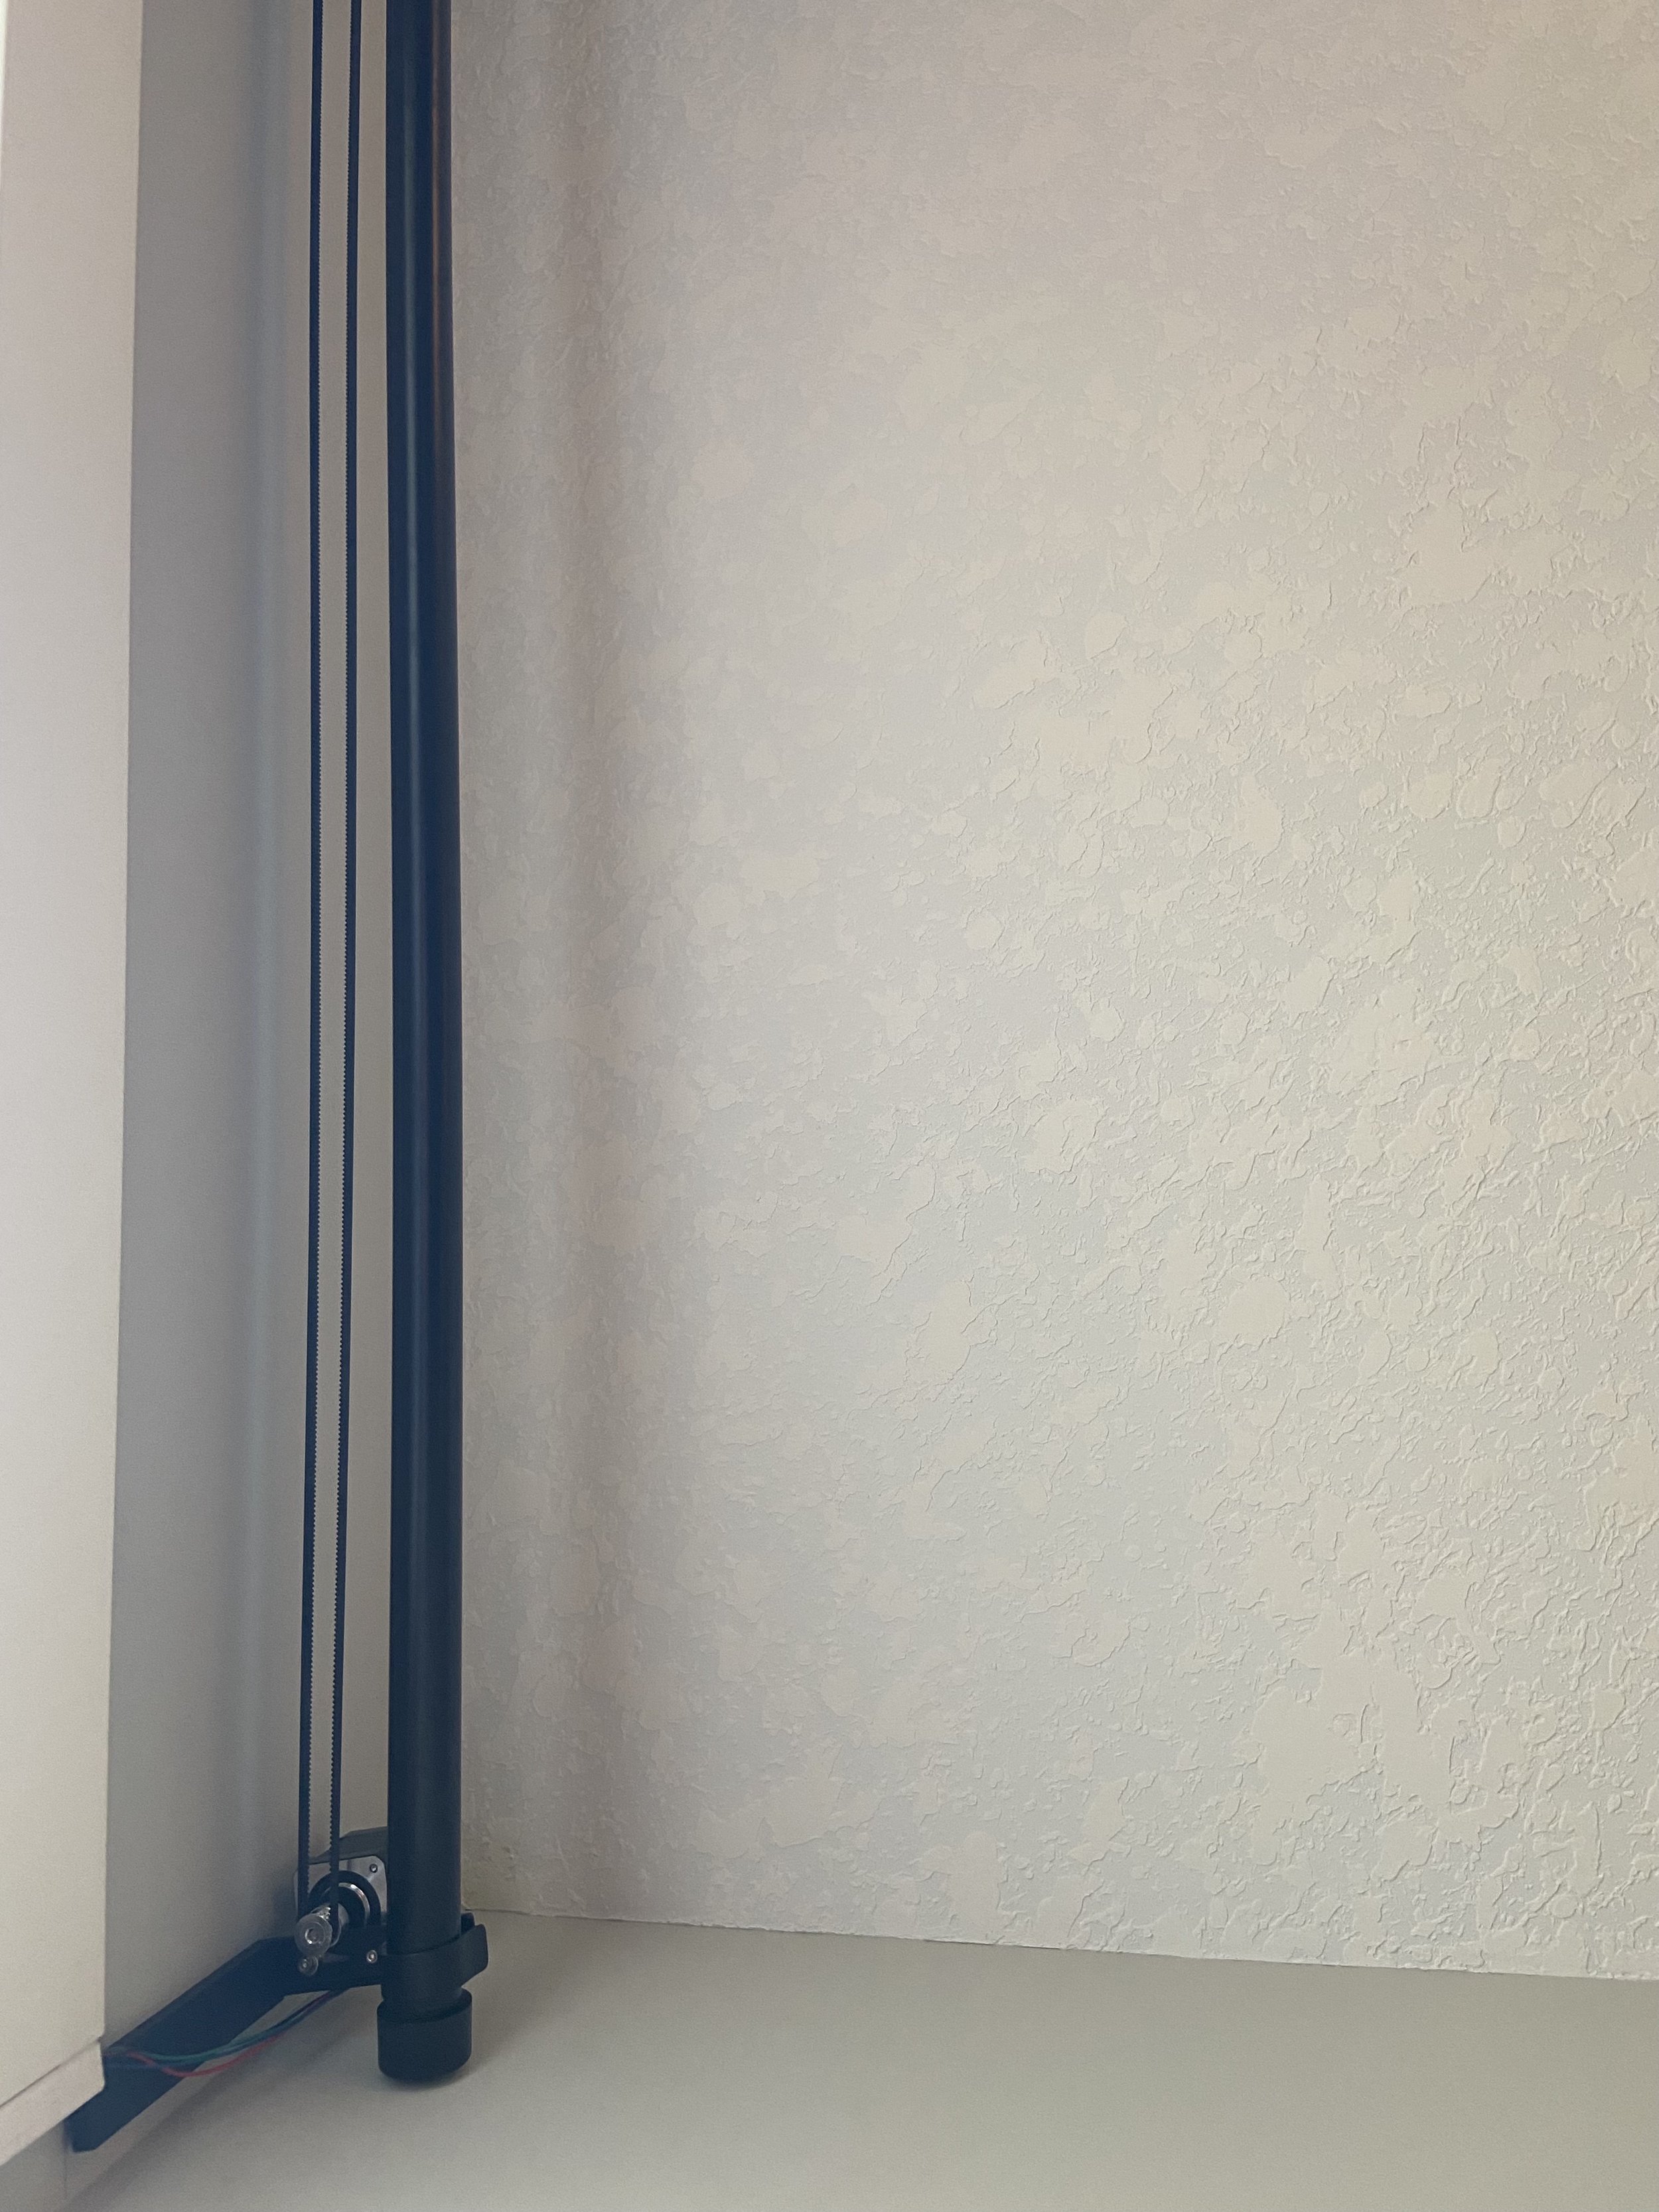
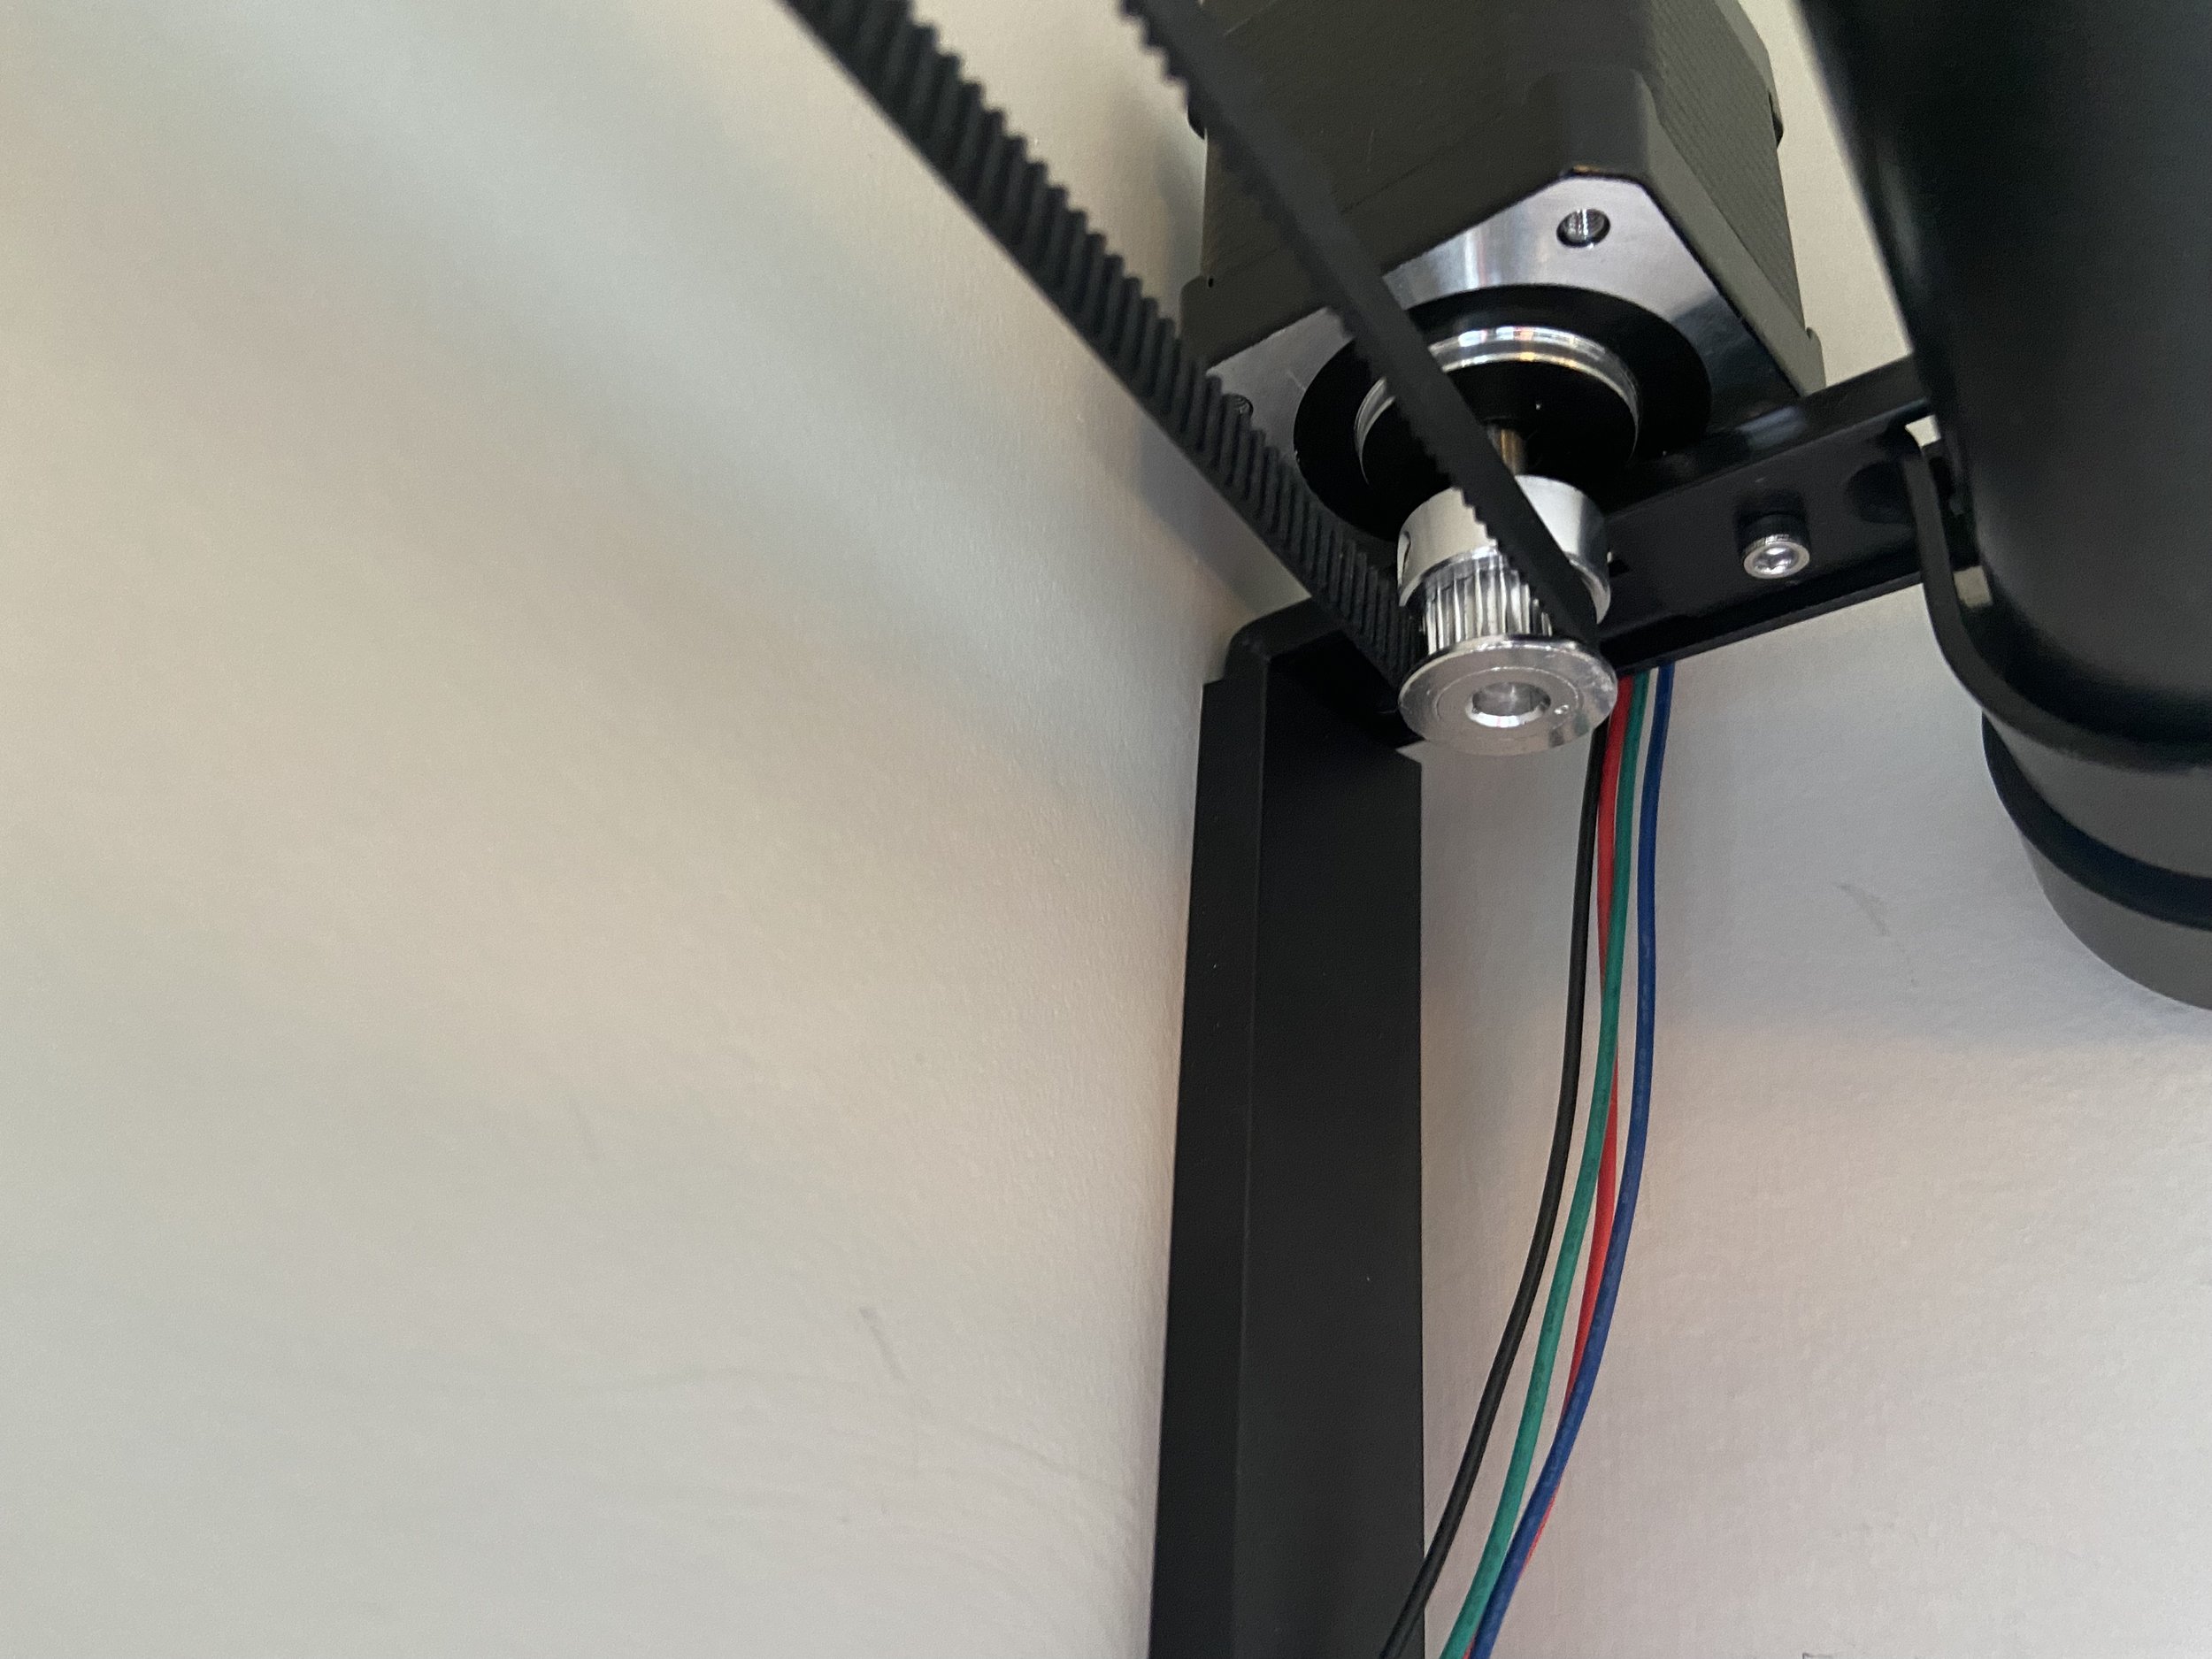
It's important to ensure that the stepper motor used is strong enough to avoid skipping steps during the opening or closing of the drapes, so that position is maintained over time. Although a limit switch could be installed, I did not think it was needed in this case and so far I have been right!
Convenient Control from Bedside Dashboard
One of the fantastic features of this project is that I can now control the drapes from a dashboard located conveniently next to my bed. My Google Display not only allows me to open and close the drapes with the click of a button, but it also provides me with real-time indoor and outdoor temperature data. Additionally, I can control the lights in my room with ease.
This added convenience enhances my daily routines, making it effortless to close the drapes and adjust the lighting before bedtime. It's all available at the touch of a button, right from my bedside.
This can be done in 2 ways, either by adding the drape entity from Home Assistant to your Google Home, or by casting a dashboard from Home Assistant to a Google Display. I like casting since I have more control when creating a dashboard in Home Assistant. You can create a custom Google command which triggers the dashboard to appear and then swipe to return you Google Display to normal. Check out this page to learn how to integrate Google Assistant with Home Assistant! Now I can say “Hey Google, bring up my dashboard”, and my custom dashboard will appear on my Google Display. The best part is that it’s interactive! I can tap on the icons, and control things in my room right from my bed!
Here’s what my custom dashboard looks like:

The weather card I used can be found here. I have found it to be the cleanest one in my opinion. This same weather card casts to my TV every morning when I walk downstairs which is a nice way to see what the weather is looking like! You can try that too if you have a presence detection sensor, and a chromecast TV!
Considerations with DC Motors
If you're thinking about using a DC motor, it could work! A few things to consider first though. DC motors may require a limit switch to ensure precise positioning, which might not be necessary with a stepper motor. The precision of the stepper motor is valuable in maintaining the correct position over time without the need for limit switches. DC motors also typically generate more noise than I want for something so close to my bed.
If you happen to have a quiet DC motor available, it's certainly worth a try to reduce costs and simplify the control (check out my original window control post here for more information about how to use DC motors with Home Assistant).
Conclusion:
Now I can wake up each day to the sun! As winter approaches, the sun has been doing less of a good job of waking me. Luckily, I have my lights set to slowly turn on before my alarm. In this way I can help out the sun in the winter months with some artificial light. I’m already looking forward to the spring when my drape automation will allow the sun to great me once more!
As with any DIY project, there's always room for improvement. In the future, I've considered the possibility of connecting the drapes to the belt using neodymium magnets. This would provide greater user flexibility, allowing manual control of the drapes whenever desired. The automation would seamlessly pick up the drapes from wherever they had been positioned by the user, offering the best of both worlds.
However, this does introduce a unique challenge - the "true" state of the drapes may not always be known. While I appreciate the data and nice graphs that come with having a precise position to plot, I can foresee moments when I might want to adjust my drapes manually. This could be especially useful in areas of the house where guests might have access and may not be aware of the automation system. In such cases, enabling manual control without compromising the automation's functionality would be a significant advantage.