Advanced Window Control (plus a new window actuator!)
What if you could accurately control the temperature in your house with only your windows? Now that my windows are controllable, it only makes sense to implement some more advanced control (more than just open/closed) which would allow me to maintain a specific set point in my room. Before getting into the advanced control, I made a few upgrades to my actuator system in preparation for this…
Upgrades to Actuator System:
After using my windows for a while, I had a few ideas for improvements:
Reduce actuator noise: Although the geared DC motors I was using were not very loud, I could still hear the actuator if I was near the window and not making any other noise. This was not a big problem but I knew that it would be possible to fix it.
Improve motor position accuracy: The current DC motors rely on time intervals to fully open and close with a limit switch to ensure the window is closed. While it is possible to approximate partially open positions of the window using a time interval between fully open and closed, I wanted to more accurately position the window within these two limit positions.
Reduce enclosure size: I didn’t mind the size of the enclosure, but it did block a small part of the window. I seemed only natural to want a small footprint if possible.
Replace the 3D printed coupling: Although this method of coupling worked, it was not as strong as I would like and risked breaking overtime. The total cost and time to replace it was minor but it was an inconvenience I wanted to illuminate.
The solution to the first two problems was pretty straightforward and only cost me a few dollars more than the original design. Stepper motors are not only very accurate, but also very quiet. By replacing the geared DC motor in the system with a stepper motor I was able to eliminated all the noise related to the system itself and position the window exactly where I wanted. Although the motor itself was about the same as the previous one, I did need to buy a stepper driver to control it.

Now to solve the last two problems… The primary constraint on the height of the last design was the top of the motor. Since the motor was attached directly to the window shaft, there was not much that could be done with that design unless I was able to shorten the coupling length a bit. I decided to place the motor next to the shaft and couple the motor and shaft using a belt instead. This means that the motor can be very close to the ground and the 3D printed coupling is no longer a problem. If a problem happens with my window now, the absolute worst case scenario is that the belt skips. I prefer this to a broken part as the system can continue working with almost no problem. When I have time, all I need to do is reset the zero position rather than print and replace a part. This new method did however require me to design a few new 3D parts.

Considerations:
Belt tension: The new motor mount needs to include a way to tension the belt between the motor and window shaft. I need to be able to easily install the motor, and then tension the belt sufficiently that it won’t skip. It also may initially stretch a bit, so being able to adjust it once installed is important.
Torque: A belt system will lose a bit of efficiency compared to a direct drive, also the stepper motor is not geared like the previous DC motor. This means we should considered including a gear ratio when designing the pulley coupling for the window.
The New Parts:

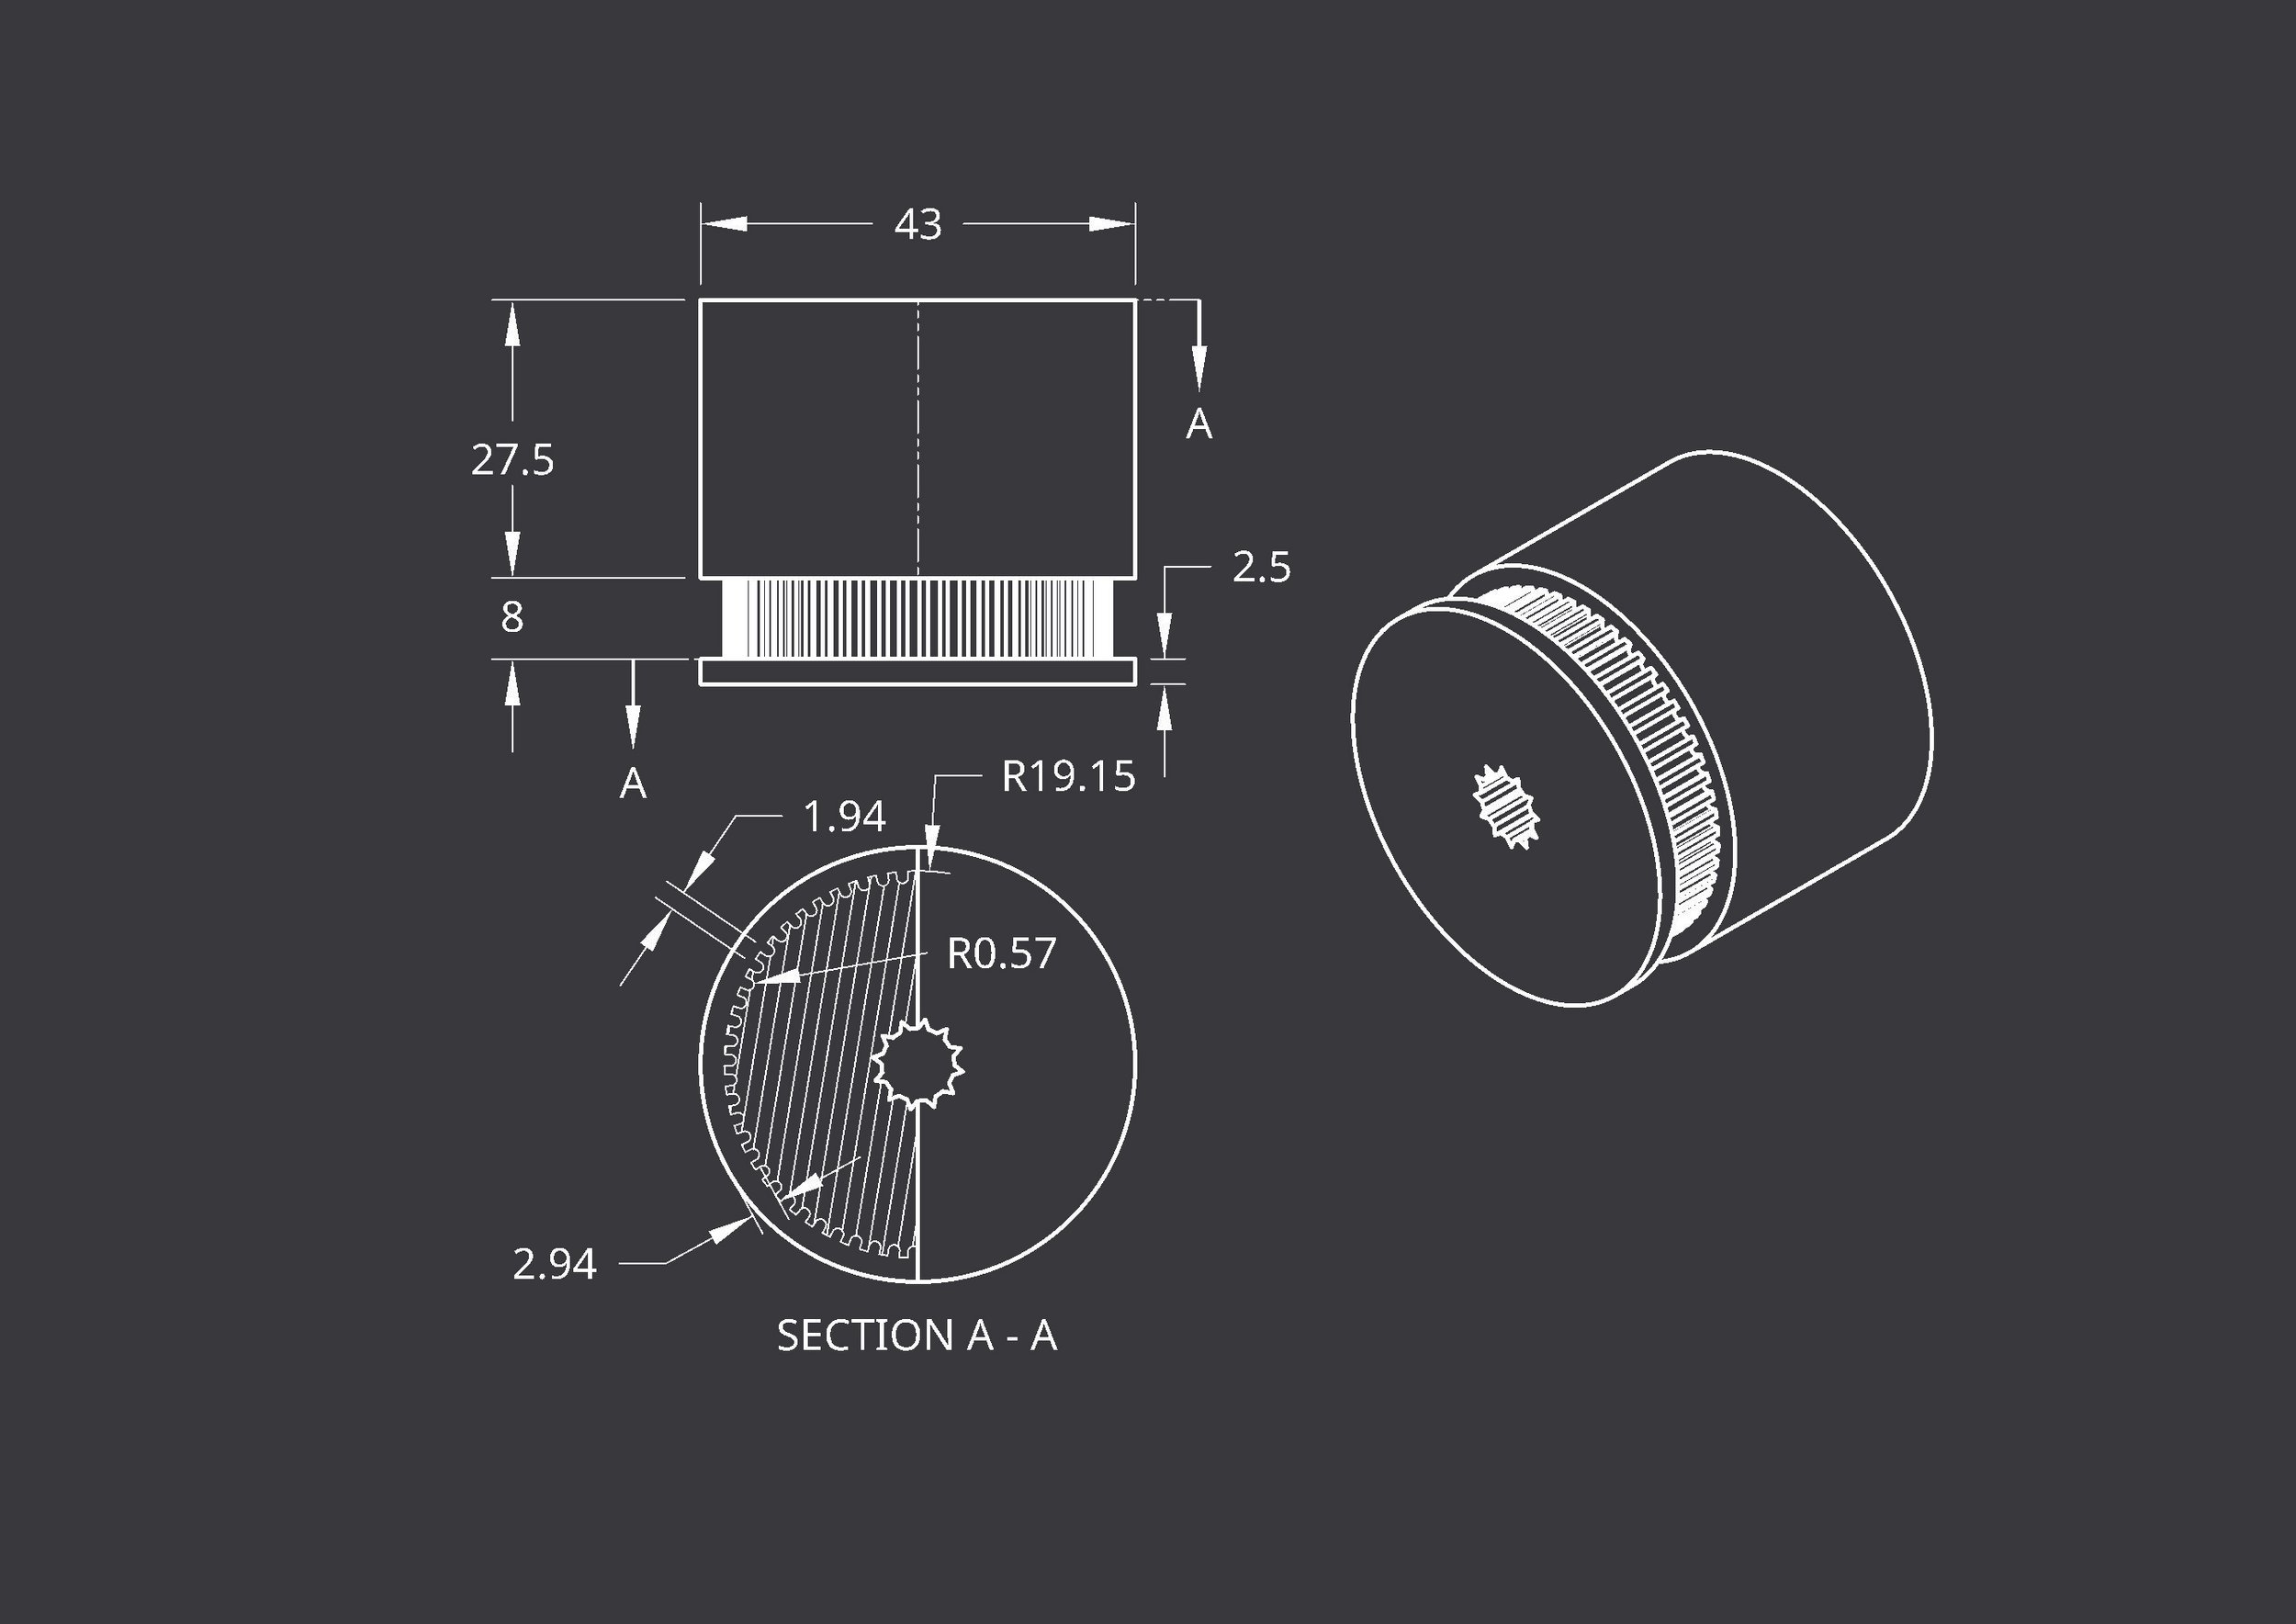
In total, there are three new parts. The first two secure the motor to the base of the window and allows the motor to be positioned horizontally in a way which tensions the belt. The third part attaches to the window shaft and allows the belt to turn the window. This third part has an extruded cylinder which faces outward and allows the window to be manually operated if needed without removing the entire system. This is not really important in most cases but is useful if the zero position needs to be reset.
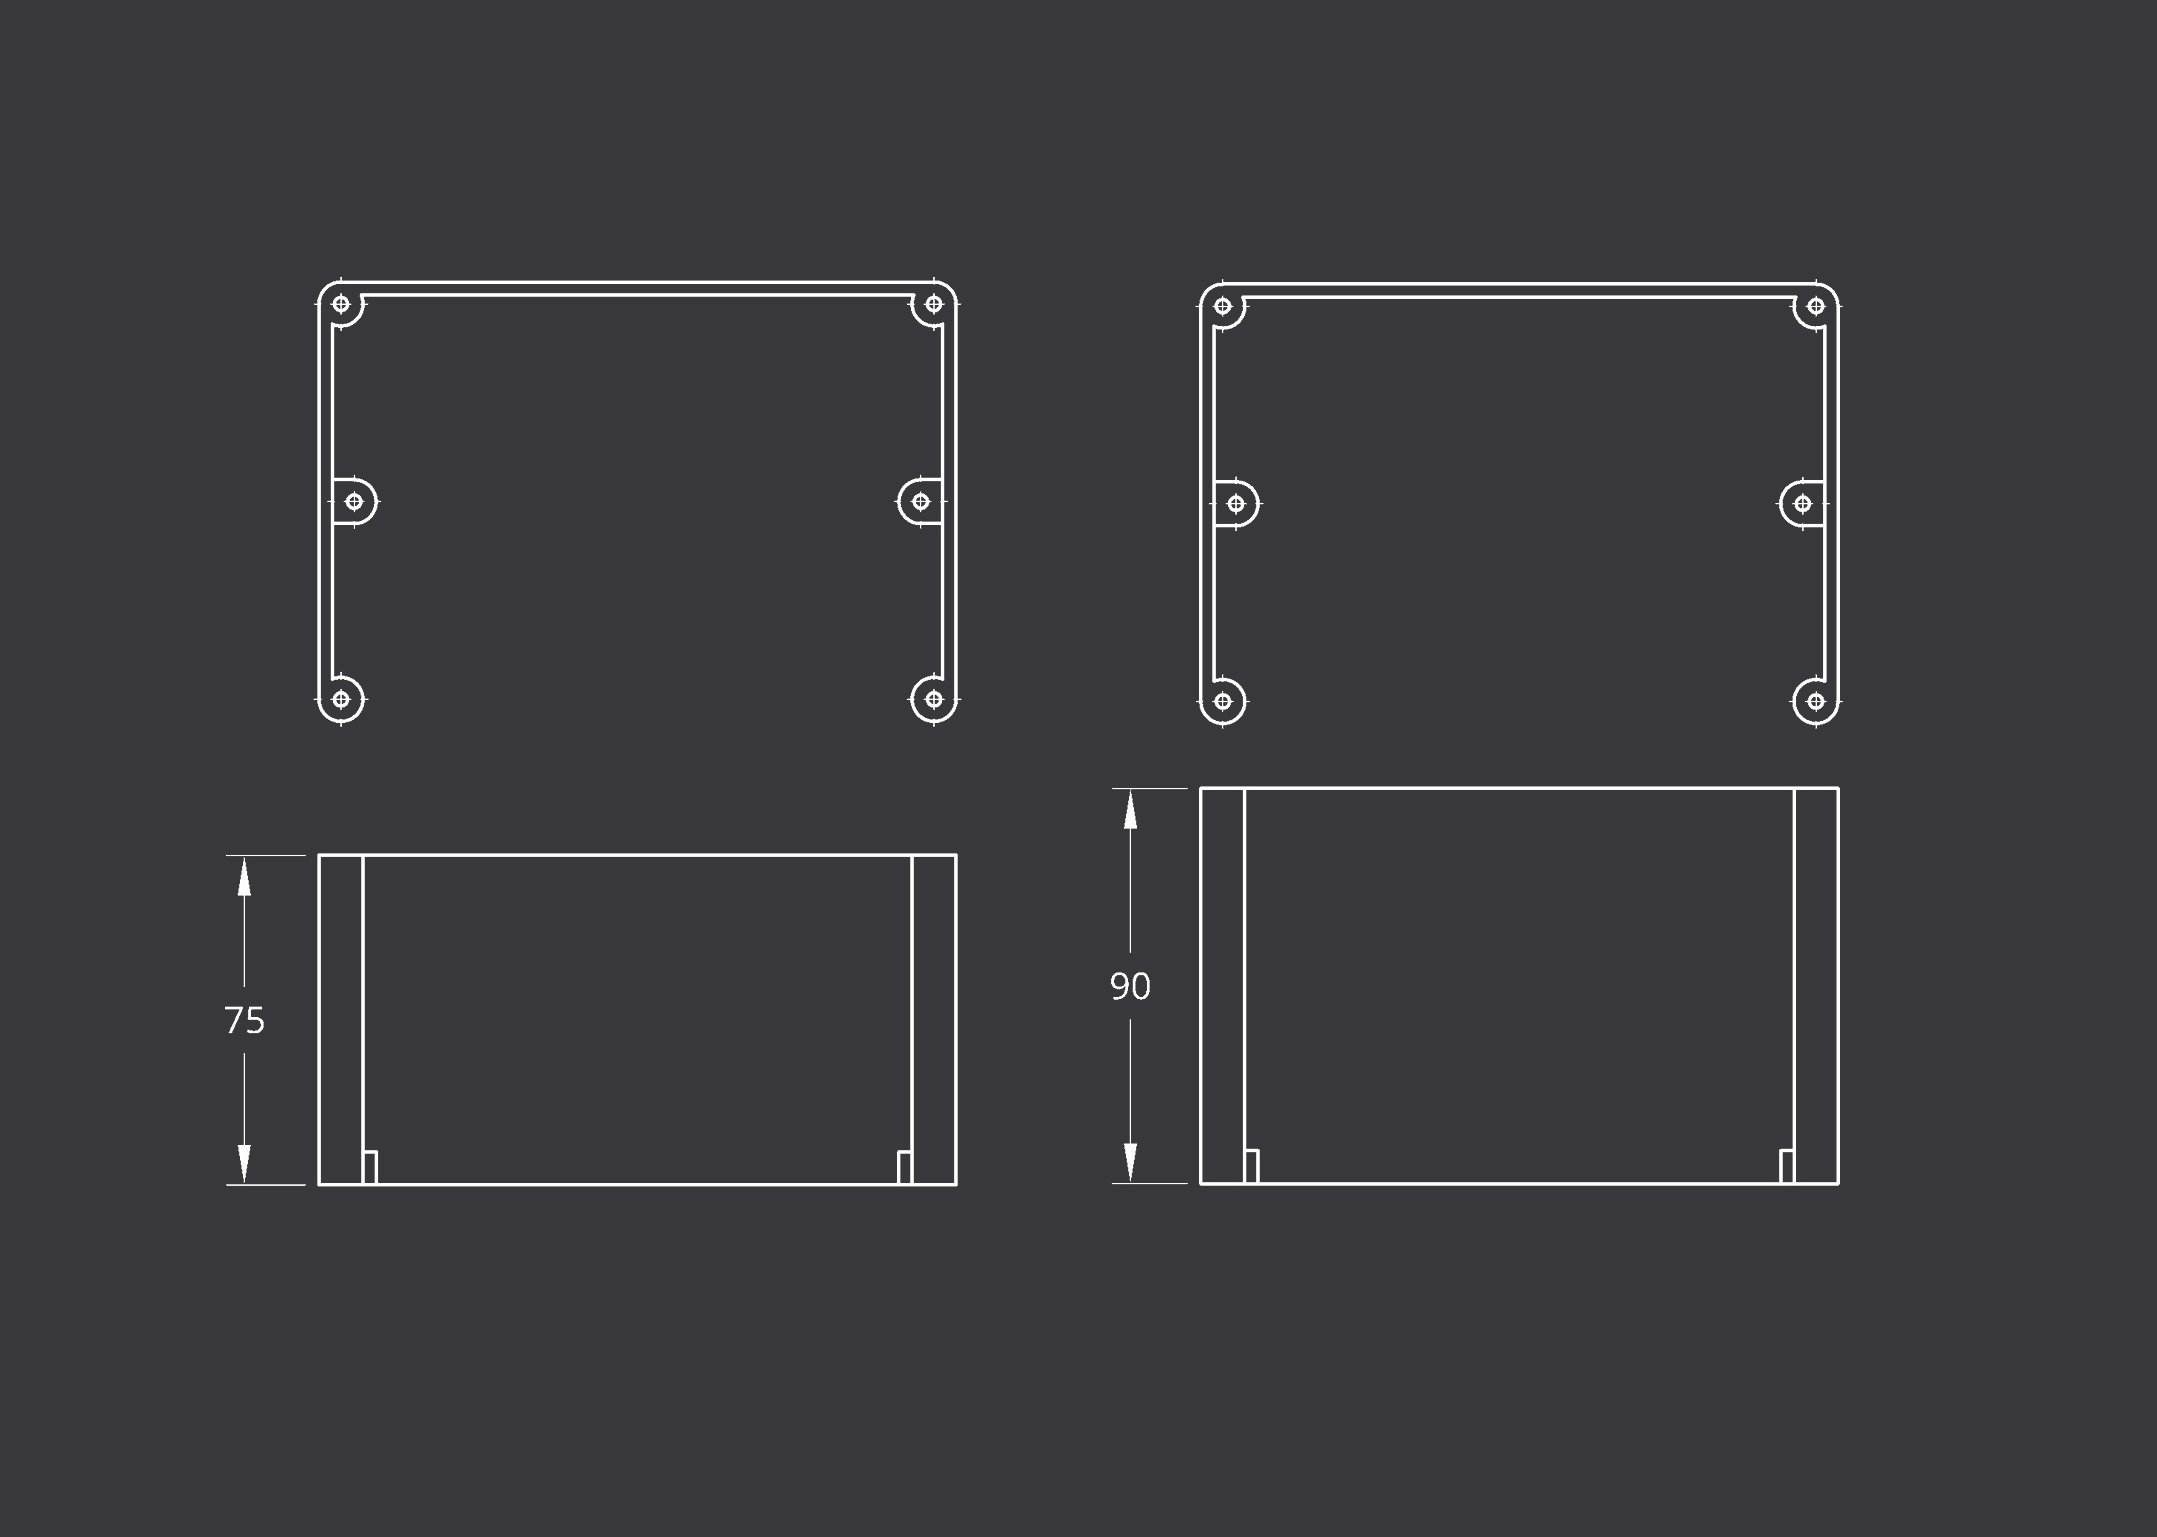
The fourth part is not really new, just a shortened version of the original box enclosure. The new system allows for a 17% reduction in overall height. Considering the window ledge is 50 mm in height, this is a 38% reduction of the window area blocked by the enclosure!


Advanced Control:
With the new improvements successfully implemented, it’s time to look at some more advanced control:
Opening and closing the window remotely is nice, but I want a bit more. Specifically, automated control of the position so that temperature is automatically maintained in my room. To make this work I need some information from the environment.
Inputs:
The current outdoor temperature
The current indoor temperature
The current weather
Desired indoor temperature
Considerations:
The outdoor temperature is important as we want to ensure the window will only be open if it is cooler outside than inside. If not, we know this method of cooling will not work. The current weather is also important since we want to make sure that the window will not open if it’s raining outside. Both of these inputs can have varying levels of accuracy depending on what is used obtain them. The most accurate way to get the outdoor temperature is installing a sensor outside (that is what I did), but the built-in weather integration in Home Assistant will give the current temperature in your area. The weather would ideally come from your own weather station but since I cannot set that up, I am relying on Home Assistant for the current conditions outside. The indoor temperature comes from my Ecobee thermostat and the accompanying room sensors.
Control Type:
There are several options for controlling my window. One of the simpler methods to implement is a PD controller. Home Assistant recently introduce a built in Derivative sensor component which makes this even more simple. For this type of control, we just need to calculate the difference between the desired temperature and the actual temperature. Then we calculate the derivative of this difference and use both of the values as inputs for our window. By adding a gain to each of these we will get a value between 0%-100% of our window position depending on the difference in temperature and the rate at which the difference is changing.
By adding some conditions to this controller, we can automatically switch between AC cooling and window cooling. There are a few cases when window cooling is no longer a good option:
It is hotter outside than inside
It is raining outside
The temperature inside is much warmer than the set point
When it is time to sleep (it can be noisy outside)
Since I have an Ecobee thermostat, I can easily turn on and off the AC in my house which means switching between these two cooling methods is very simple and can be made completely automatic! The following code shows how I implemented the control scheme:
The Code:
First, in the our configuration.yaml file, let’s create some ‘sensors’ that will calculate the error and the input for our window. Since Home Assistant now has a built in derivative sensor option, our derivative sensor is defined within the Home Assistant UI.


Now technically all we need to control the window is an automation which updates the window position based on the input. Of course we want to add a few conditions as well. Similar to the way the blinds are controlled, there is a slider defined in Home Assistant which controls the position of our window. Every time the value changes, the value is sent to the micro-controller. The action to control the window using our PD controller would look something like this:

Now if we implement the conditions we previously discussed, we get a more complicated automation as follows:

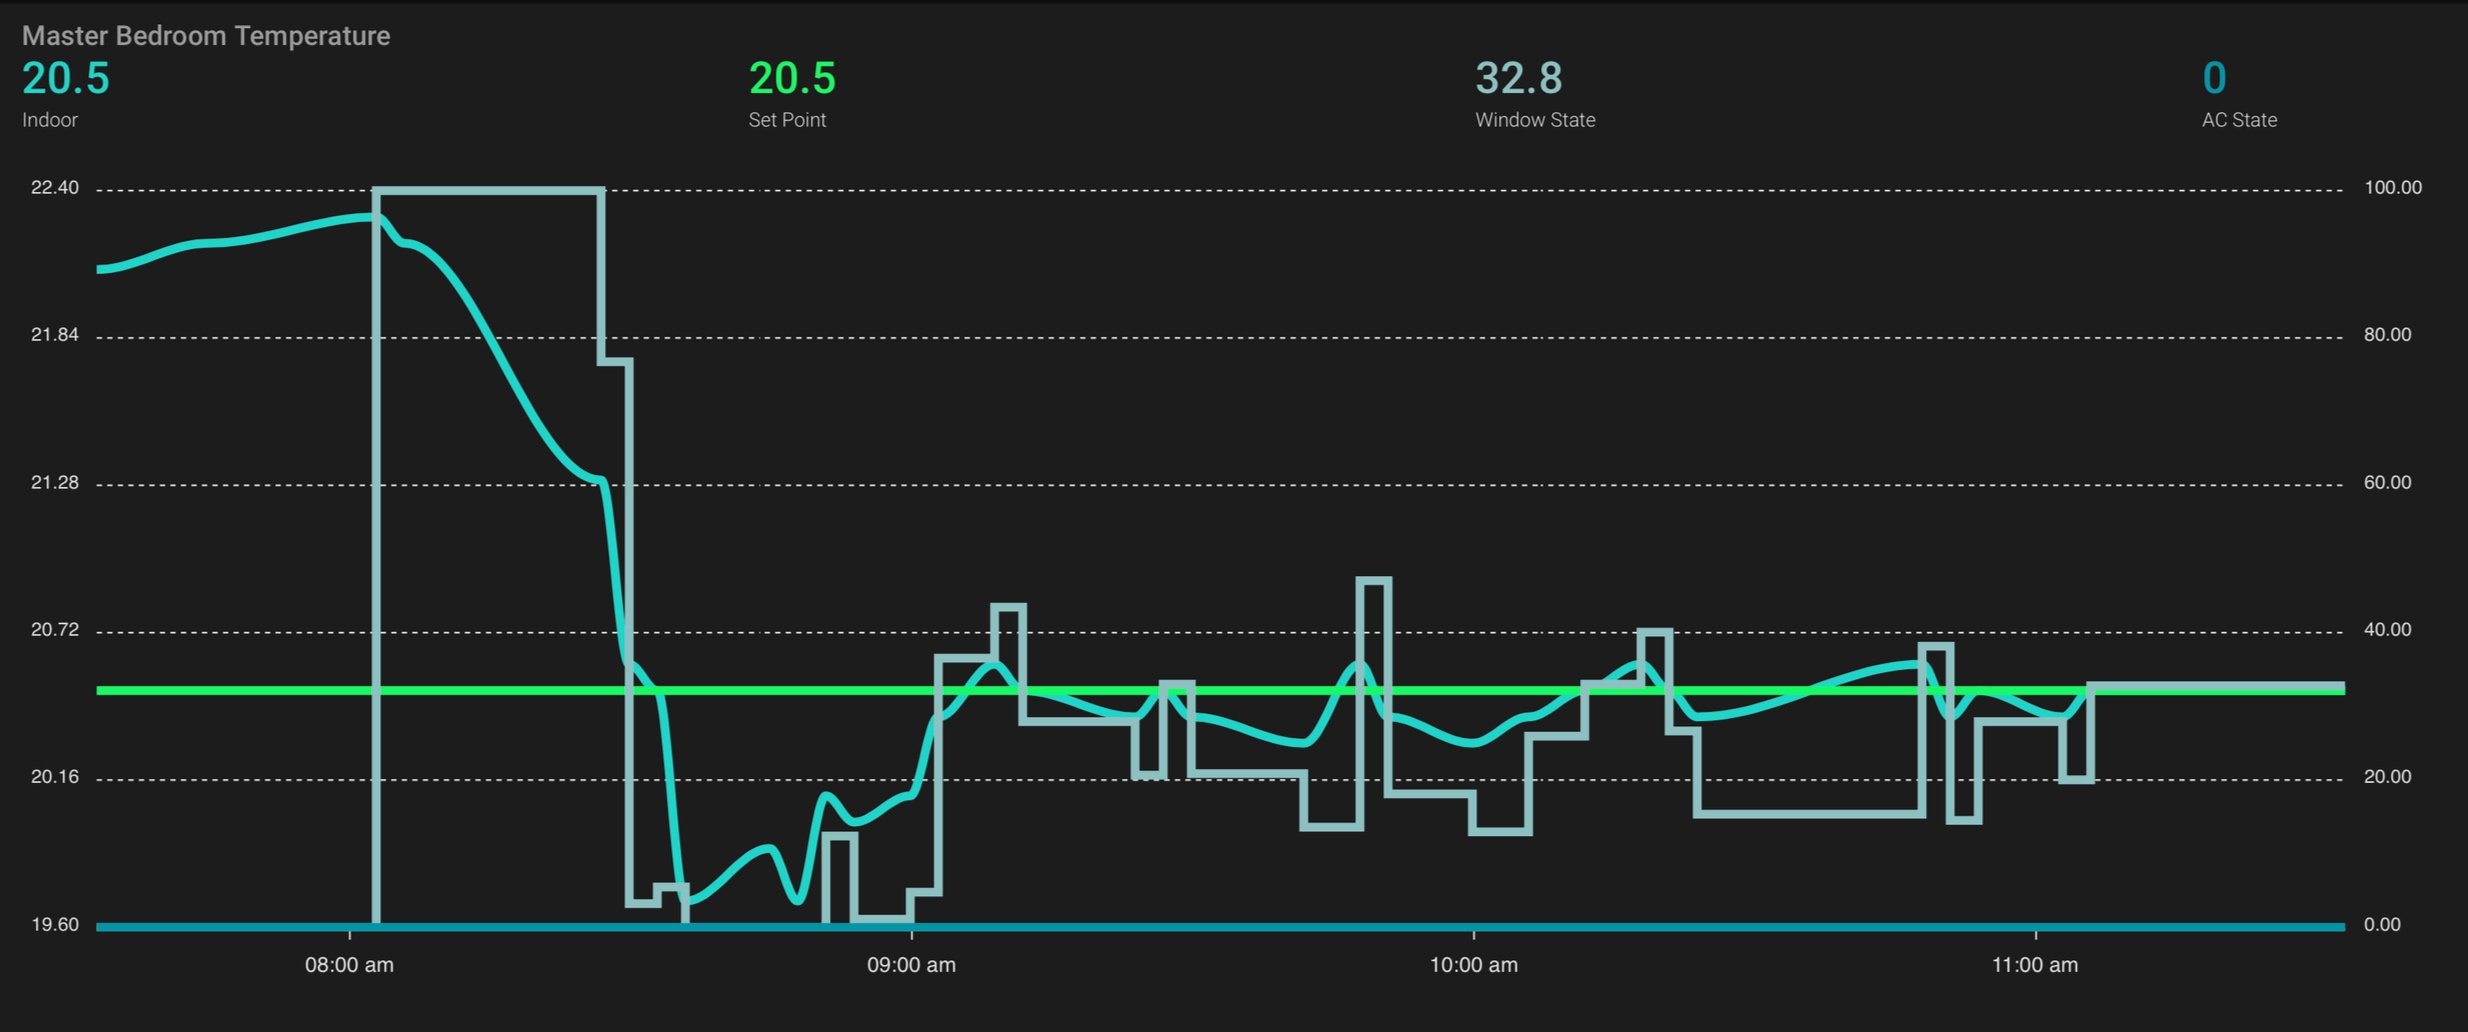
The graph below shows the window working to bring the indoor temperature down from 22.3 when I woke up, to the set point of 20.5. We can see when I enabled the option of window cooling shortly after 8 AM.

The window goes from 0% open to 100% open, then begins to find the ideal percentage to maintain the desired temperature. During this time the AC is kept off.
Considerations:
The only input which is not exactly location specific is the current weather conditions since I get this from the nearest weather station. Either building my own weather station, or something to determine rainy vs not rainy conditions would allow the window to operate in more conditions with higher certainty.