How I created a better wireless light switch remote for less.

I really like using the Lutron Caseta dimmer switches. They are easy to install, work great with Home Assistant, and so far have been very reliable. The one thing I don’t like however, is their 3 way switch remote. When you have more than one switch for the same set of lights, you only install one smart switch. The other switch(s) are removed and the wiring configure in such a way that the smart switch always receives power. Often the other switches which have been removed are replaced with a wireless remote, which in most cases is made to look exactly like a switch. The problem with the Lutron remotes is that they can only be configured to work with one set of lights since they are paired to a single smart switch in the app. To make matter worse, they do not show up as a new entity in Home Assistant. Considering these are wireless buttons, it bothers me that they cannot be configured to do more than a regular light switch. Anytime I have a button or switch in my house, I want it to be completely customizable and ideally have multiple functions. This was the inspiration for making a better wireless light switch remote. The Lurton Caseta switches I will be controlling in this automation are shown below.

Constraints and Part Selection
The Lutron three way remote costs an additional $10 when bought with the switch and $20 on its own, so our switch should be ideally no more than $10. The button must be able to control our lights similar to a normal remote switch would (i.e. toggle on and off). It must also be able to trigger other automations or devices via Home Assistant. The system should be able to be removed without leaving a trace and allow the original light switch to be re-installed.
Something like the Sonoff wireless button which costs less than $10 per button (Amazon, $19 for 2) will work well. It operates on a Zigbee communication protocol which I already have set up with Home Assistant (see note below about if you don’t have this). This button offers 3 different triggers, single press, double press, and long press. Therefore, we can control up to three different automations or scenes with it. The Sonoff button is shown in the image below.
Note: If you don’t already have Zigbee set up with Home Assistant, I highly recommend it. Many sensors and wireless buttons work using this communication protocol and any that do, do not require an additional hub (even if it says hub required) to work with Home Assistant. All it takes is a $5 Zigbee dongle (AliExpress), plugged into whatever is running your Home Assistant instance. Then simply setup the ZHA integration (more information here)and you’re ready to start connecting sensors and remotes!

Connecting The Button
Let’s connect this button to Home Assistant: First, we need to remove the back cover. Press and hold the now visible reset button on the back of the button. Within the ZHA integration in Home Assistant, click on “add device”. The device should show up and be added automatically. Since it is a Zigbee device, we need to do use little work around for Home Assistant to recognize the three triggers. Someone called Jeremy Fisher has already made a blueprint for us which makes our lives very simple. The blueprint will let us select an action for each of the three triggers. In this case, we probably want to set the single press to toggle whichever lights are connected to our smart switch. Since most of my switches are now smart switches, the single press toggles one set of lights and the double press toggles another set of lights on the same floor. The long press can be reserved to trigger anything our heart desires. For example it can be set to turn off all the lights in the house. This can be done by have this trigger activate a scene which includes all the controllable lights set to off. The image below shows how simple it is to use the button with the blueprint to toggle lights.

Installing The Button
Once the button is configured and connected to Home Assistant, we are ready to consider how to make it look like a light switch. All we really need to do is build something to hold our button in place within the light switch hole and a cover for our button which will make is look like a regular light switch.
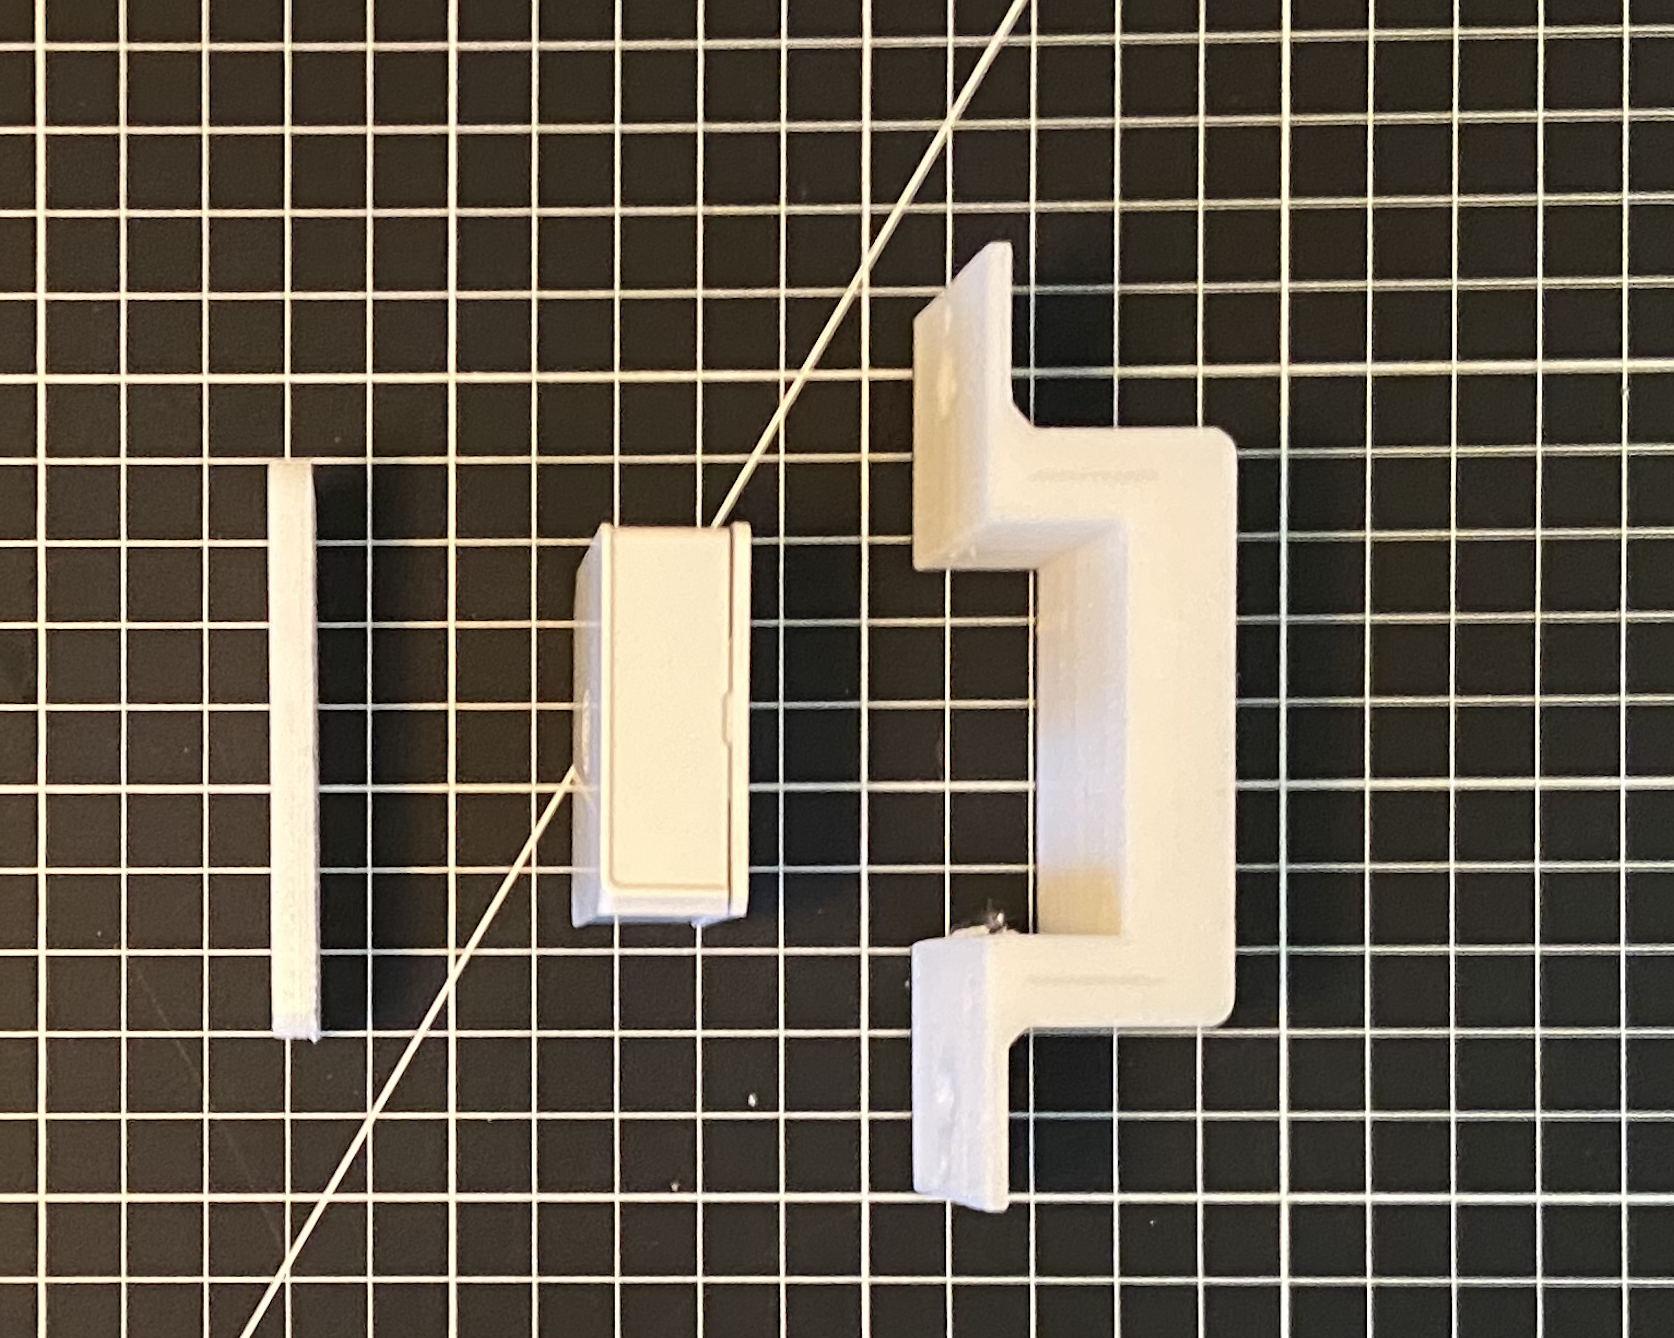
First let’s design the holder. Some simple measurements of the inside of our light switch hole lets us know how to space our screw holes. Measuring the depth of our button lets us know how deep to make the holder. This leads to the design shown below. This will hold our button in place within the light switch hole.

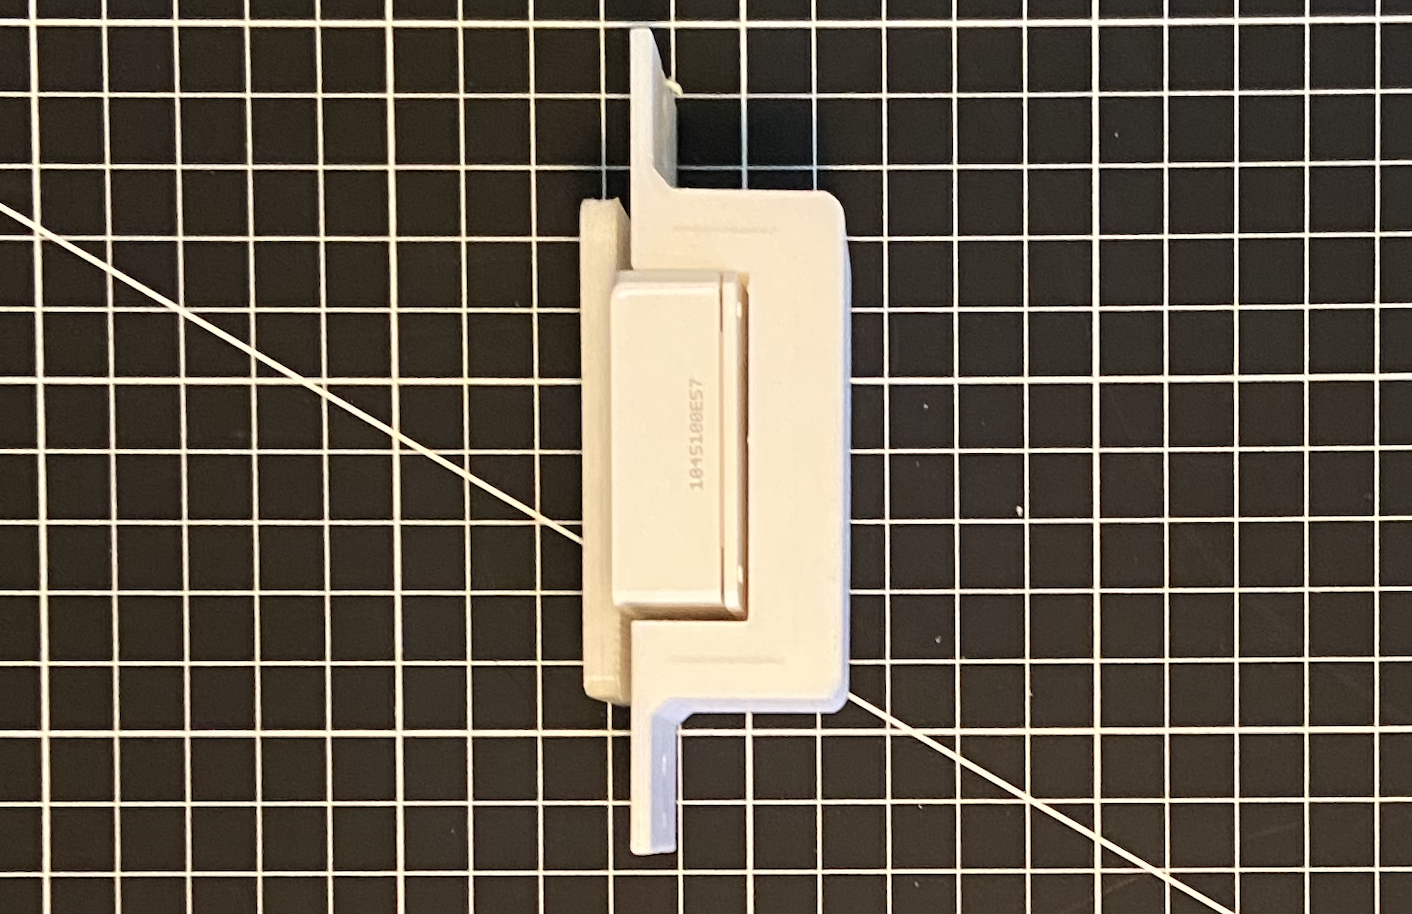
Now we just need to measure the rectangular dimensions of a regular light switch (the shape that is visible through the light switch cover). This will give us the shape of our button cover. Below you can see how the two 3D printed parts and the button are put together. These can be secured to each other using some strong 2 sided tape. Glue should be avoided since the battery will eventually run out and the button will need to be removed to replace it. Notice the small gap between the button cover and the button holder. This way, when the cover is pressed, the button will be able to compress and trigger.
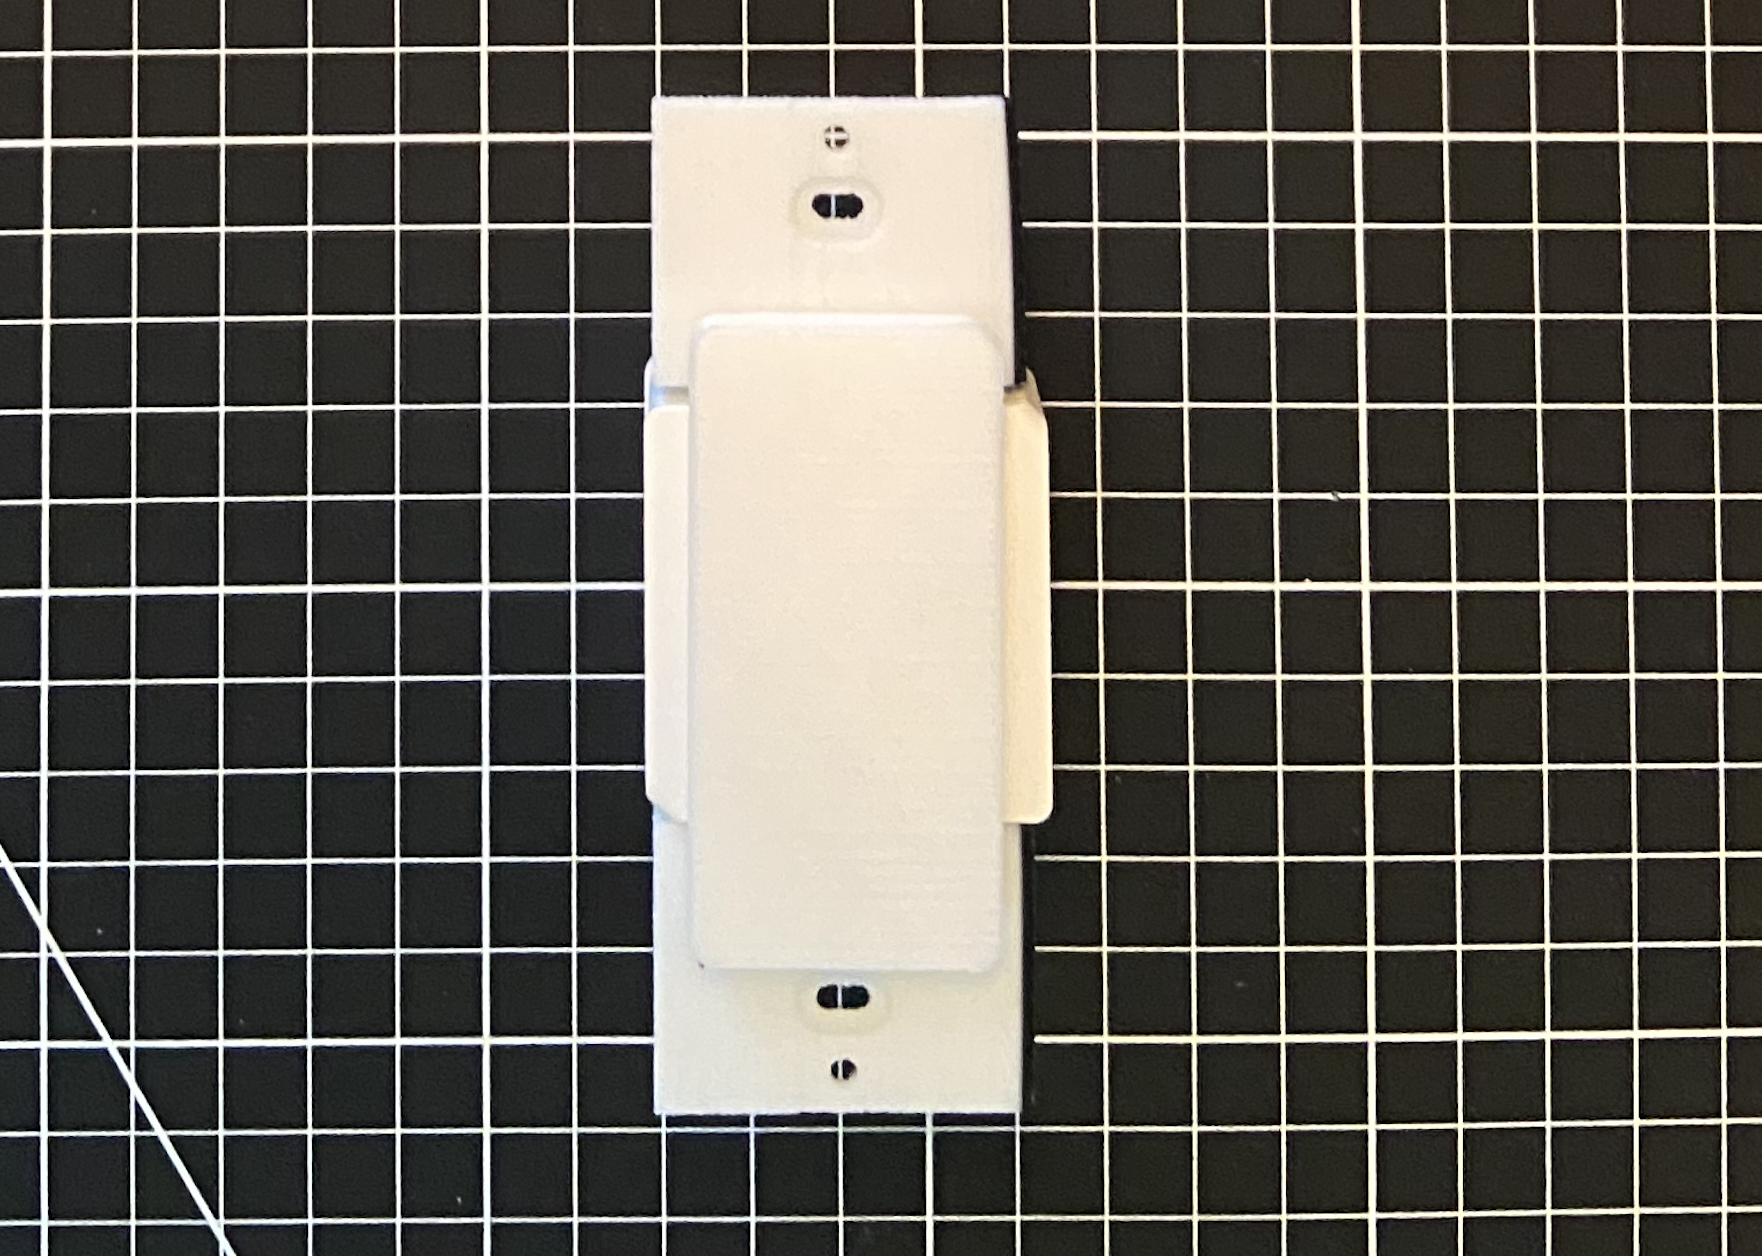
Now we’re ready to install the new switch. Assuming the old switch is already removed and the wires have been dealt with (since we installed a smart switch on the other 3-way switch controlling the lights), we can use the screws from the old switch to connect our switch in much the same way. The final result is show below.

Now we have a smart switch, which not only turns our lights on and off, but can also trigger just about anything else we have set up in our house (including other lights in our house).